Oven Mitts = Love
I always have a hard time coming up with Mother's Day present for my Mother and Mother-in-law. They are both fabulous women and nothing seems to be enough.
I think homemade gifts really give a little extra!
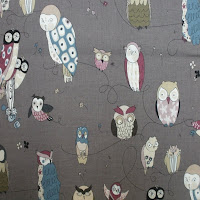
My mother-in-laws maiden name is "Lemons", so when I came across this fabric I new I had to make her something with it!
And she LOVES to cook. Enough said.
OVEN MITT TUTORIAL:
I decided to create my very first tutorial.
Be nice, like I said, it's my first.
Disclaimer: I am a beginner sewer. I don't know all the fancy terms and how to use them right, so if something doesn't make sense, feel free to laugh at me a little bit. And if you have a better way of doing something, awesome! Do it. Good luck.
WHAT YOU NEED:
1/2 Yard 100% Cotton Fabric (the lemon fabric)
1/2 Yard Insul Brite (I found this at Walmart)
1/2 Yard Terry Cloth
Coordinating fabric for the trim along the bottom. Not much, a large scrap piece should work.
CUTTING:
*Make sure your fabric is folded in half, wrong sides together.
*Trace an oven mitt that you love, 2" wider all the way around. When you cut this out you should get 2 pieces. (they will be a mirror image of each other)
*Repeat this again on the folded fabric and cut 2 more pieces.
*You should have 4 pieces of the cotton print.
(you don't want all 4 pieces to look exactly alike, 2 should be the same, and the other two should be a mirror image so we can put them together later on)
--Then use one of those pieces as a template to cut out 4 pieces of the Insul Brite and 4 pieces of the Terry Cloth. Just as before, make sure the Insul Brite and Terry Cloth is folded so that you get 2 pieces that are the same, and 2 that are a mirror image.
You should have total of 12 pieces.
-4 prints
-4 Insul Brite
-4 Terry Cloth
NOW: Take a break and get a diet coke :)
ASSEMBLY:
*Pin 1 piece of the cotton print, then 1 piece of the Insul Brite, and then 1 piece of the terry cloth together. 3 Layers.
*Using 1/4" seam allowance, baste stitch around the oven mitt. You can leave the bottom open if you like. This stitch comes in handy later on, it will hold all 3 pieces together when you quilt it!
*Repeat for all pieces.
So you should now have 4 pieces, with the print on the front, a layer of Insul Brite in the middle, and then the terry cloth on the back.
QUILTING:
*Take 1 of the 4 pieces, and begin by stitching a straight line diagonally across one end of the mitt.
*Then move a few inches down and sew another straight line.
*Repeat until the entire mitt is full of parallel lines.
*Then, turn the mitt the other way and repeat, so this will be your finished product.
*Repeat for the other 3 pieces.
You will have threads galore! Trim them up a little bit now, and it will save you a bunch later.
Now we will create a bias tape for the trim.
*You will need to cut 4 strips of fabric, 2"x however long the bottom of your mitt is. My pieces were about 2"x7".
Now, heat up your iron and let's get to work.
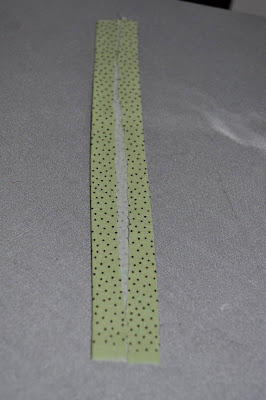
*Fold the pieces in half, lengthwise and find the center.
*Then fold each side in to the center and press down. Like this.
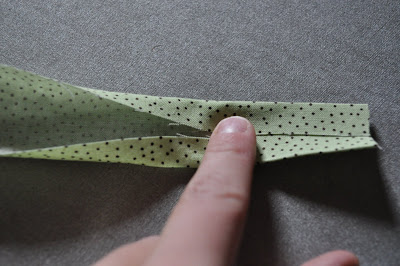
*Now fold this piece in half again and press down. I like to make one side a little longer than the other so that when I sew it on, I am sure to catch both sides.
*Repeat for all 4 strips.
ATTACHING THE TRIM:
*Now, pin the trim piece you made to the bottom of the oven mitt.
*Put the side of the tape that you made longer on the side of the oven mitt that won't be able to see when sewing. That way you are sure to catch it.
* Then sew it on.
*Repeat for all four pieces.
Oooh, they are starting to come together!
CREATE THE MITT:
*Next, pin two of the pieces, right sides together. And then sew them together. You may want to use about 1/2" seam allowance here. You want to make sure that you catch all 6 layers of fabric. Make sure you are sewing on the inside of the very first seam you made (the baste stitch).
Don't sew the bottom shut.
Now you need to clip the area between the fingers and the thumb.
*Make clippings about 1/4" apart and right to the seam. Be careful so you don't clip through the seam you just sewed.
*Repeat for the other two pieces.
Turn right side out, iron, and viola! You have two fabulous Oven Mitts!


