I really wanted a pink minky cover for my changing table, but guess what....
totally hard to find one!
So I decided to take matters into my own hands, and make one!
I went to Joanns and used a coupon to get this minky fabric for only $5.99/yard.
I grabbed my old cover and started measuring.
Here is what I cut:
2 rectangles 17"x7" (for the sides)
1 rectangle 31"32" (for the main body)
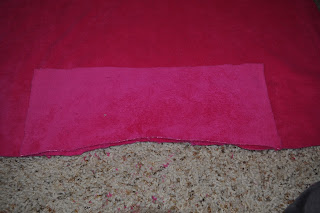
Here are the 2 sides, 17"x7"
Because the pad is contoured, I needed to make a little arch in the end pieces.
I folded the pieces in half,
and measured in about 1.5" at the fold,
and snipped all the way across, making a slant to the end.
When you open it up, it looks like this!
Next,
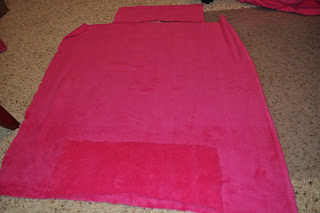
I laid all my pieces out like this,
and centered the end pieces along the 31" sides of the main body piece.
Then I snipped the main body piece along the arch on the side piece to match.
Now, it was time to break out the pins.
(pins make sewing with minky A LOT easier)
(pins make sewing with minky A LOT easier)
Pin the side pieces to the main body piece, and curve the main body piece up around the ends of the side pieces.
This way it will form the box look the cover needs.
Sew all the way around, and repeat on the other side.
Now it is time for the elastic, I used 1/4" inch because that is what I had.
You really could use any size you want.
To make the casing for the elastic,
I folded down about 1/2" of the raw edge...
and then folded that down again, another 1/2".
and then sewed right along the edge.
I didn't use pins for this part. I just turned as I sewed.
It was tricky, and there were LOTS of puckers.
Don't worry about them though, you won't even notice them.
I sewed all the way around the cover and left about a 5" opening so I could feed the elastic through.
I pinned a very large safety pin the elastic and started feeding it through the casing.
I didn't measure the elastic before hand, I just guessed, and then once it was fed through I gently placed it over my changing pad to see how tight I needed it to be and trimmed it from there.
Then I sewed the two ends of the elastic together.
And sewed my 5" opening shut.
Ta dah!
It worked!
I have to tell you, I was actually pretty surprised. Sewing with Minky fabric isn't easy, and I was totally guessing on just about everything!
Here is what the underneath looked like.
Like I said, LOTS of puckers, but they are underneath and no one will ever see them!
Like I said, LOTS of puckers, but they are underneath and no one will ever see them!
Good luck on any project you are working on.
Hopefully this little tutorial makes sense!


5 comments:
Great tutorial! Thank you!
Great tutorial! Can I just ask what seam allowance you used? Thanks.
You did an awesome job! I just made one for my changing table pad, and it turned out great!! Thank you!!
fabulous! I have been looking for a simple tutorial like this! Thank you so much!
Post a Comment